
The iPhone 16 and iPhone 16 Pro are Apple’s latest and greatest smartphones, but they are also probably one of the easiest smartphones for battery replacements. A smartphone battery is typically attached with a strong adhesive and it turns out that Apple is making it so much easier to remove the old battery with a new kind of adhesive which works like magic.
According to Apple’s very own official support page, the iPhone 16 battery replacement should be performed by a trained technician with the knowledge and experience to repair electronic devices. To access the battery, you’ll need to remove the back glass but the interesting part is the use of a 9V battery and a couple of battery clips.
How to remove the battery on the iPhone 16
Once the back glass panel is removed, all you’ll need to do is connect a 9V battery to perform a “jump start” on the iPhone 16. Do note that the positive (red) wire should be connected to the silver tab that pops out from the bottom section of the battery, while the negative (black) wire is connected to the lower right grounding screw near the bottom speaker.
After holding the connection for approximately 1 minute and 30 seconds, the adhesive should debond, allowing you to remove the battery with a suction cup tool. If you can’t remove the battery, you should repeat the process of connecting the terminals to the 9V battery until the adhesive becomes loose.
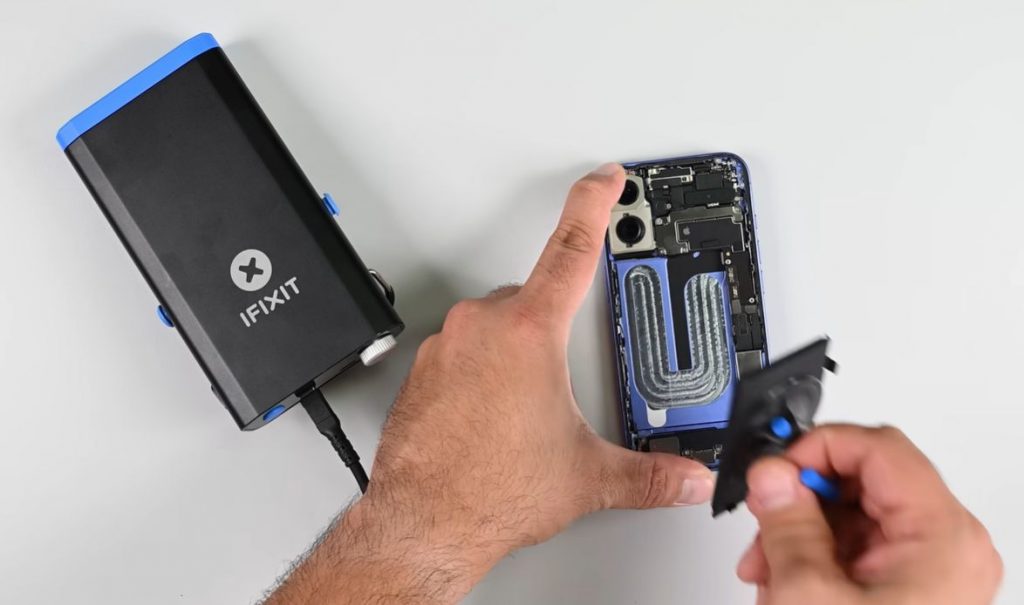
The battery can be removed quicker with more voltage
According to the folks at iFixit, Apple is using a new electrically-releasing adhesive from Tesa which allows easier battery replacement. Although Apple’s instruction used a 9V battery, technicians can also release the adhesive with up to 30V or use alternative power sources including DC power supplies. With higher voltage, the adhesive should come off quicker.
Using iFixit’s battery-powered soldering tool which allows you to connect alligator clips via USB-C, they managed to remove the battery adhesive in 60 seconds when it is set at 12V. At a higher 20V, the battery can be removed in just 5 seconds.
If you’re wondering if the adhesive can be reused to bond back the battery by switching the polarity, well it wouldn’t work. iFixit explained that if you wrongly connect the positive and negative connectors, the adhesive will still come off but you’ll end up having the sticky residue stuck onto the phone’s frame which is harder to remove. Ideally, you’ll want to have the sticky adhesive to remain on the old battery, so make sure the red wire is connected to the tab of the battery.


